Most of us take our ride height for granted. We read the manual, or take the even lazier route and follow someone else’s setup and forget it. We check it now and again (or never), and just keep running the same old thing; boring. What most of us don’t realize is that a big part of tuning your suspension is adjusting your ride height. By changing your ride height, you can change the way it transfers weight as it drives around the track. But the benefits don’t stop there. If you’re driving an off-road vehicle, your ride height will affect how it goes though rough stuff and how it launches into the air. This is a powerful tool and it can have a big impact on your vehicle’s handling characteristics. A change of just 1mm may not seem like anything significant, but on something like a touring car, this small increment can be a difference of 20% or more. Even to the most skeptical, that is something significant. In this article we are going to cover the effects of raising or lowering your vehicle and how to measure it correctly with the right kind of tools. Grab some popcorn and work that noggin’ of yours!
1. Ride Height; Ride Who, What?
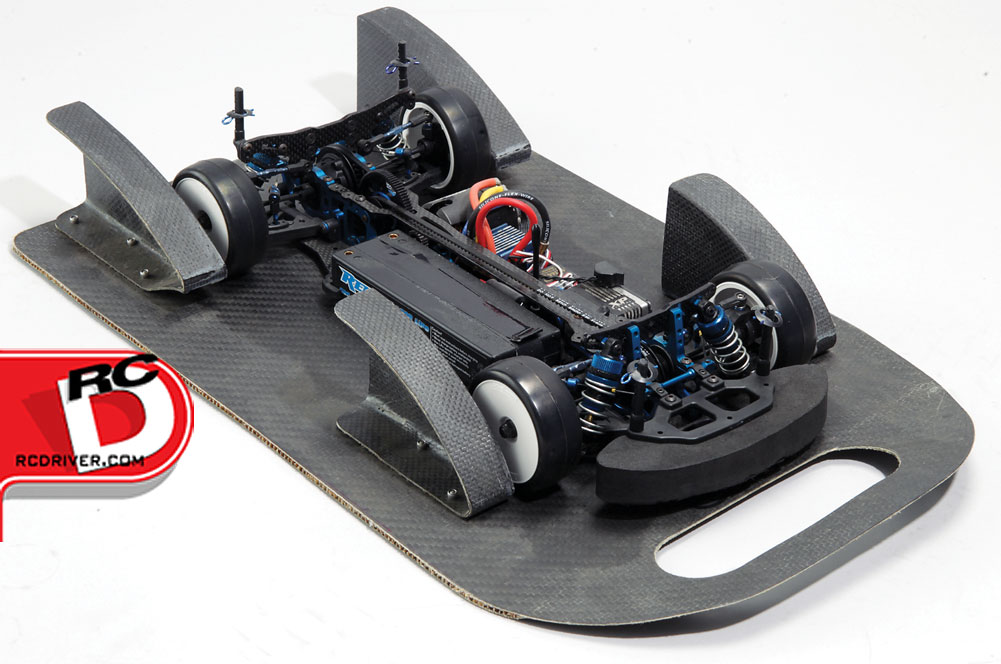
The easiest way to think about ride height is the measurement of how high the vehicle is in relation to the ground. In order to check and change your ride height, make sure you do it when the vehicle is in its static state on a nice level surface like a setup board. Also, make sure everything in your car is how it would be as it gets set on the track. This means you should make sure the battery is installed, camber is set, fuel is in the tank (for nitro), body is on (you can also do it without the body, just make sure you do it the same way each time), etc. This way you eliminate any variables that could happen between the time when the ride height is set and when it is ready to hit the track.
2. What It Does
The important thing to remember is that the vehicle’s ride height has a direct connection with the center-of-gravity (CG). So the higher the ride height, the higher the CG and this will result in more chassis roll as it corners on the track. This CG will also have an effect on how the car handles when accelerating or decelerating because this is when the vehicle is transferring weight. Also, remember that ride height needs to work in conjunction with your suspension and one can’t be adjusted without affecting another. This is where you need to find the appropriate balance between going low to be quicker in the corners and still having enough roll to maintain enough traction. However, there is such a thing as too much. Don’t lower your car to the point that the chassis or body is scraping all over the place and causing unwanted issues. Keep it within its designed range and when starting out, keep all four corners equal. This “Sweet Spot” for ride height is usually when the front arms are level. For the rear, use your outdrives and driveshafts, going to the wheels to make a referenced horizontal line (often referred to as “bones level”).
3. Start Tuning
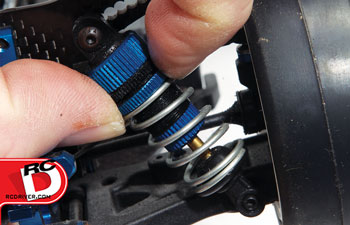
The most common way to change your ride height is to turn your spring collars (or add spring clips for non-threaded shocks) so that the springs on your shocks help to raise the vehicle up. This has the least affect on handling and it limits the variables, but there are other ways. You can also change out your vehicle’s springs. Obviously the stiffer the spring, the more resistant they are to compression, resulting in higher ride height. Another way is to change the shock mounting location. This changes the leverage on the shocks and how the car sits at rest. Finally, pay attention to the location and amount of static weight. For example, if you switch from a shorty pack LiPo to a full size pack, chances are that full size pack will come with an increase in weight, but it may not affect the vehicle in a uniform manner. If the battery is toward the rear, that extra mass will be more biased relative to its placement.
 4. Measure It
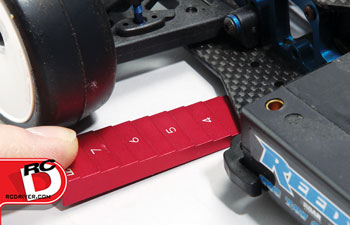
Now that you’ve made your changes, you’ll need to see how high the chassis sits. A quick and easy way to do this is with a ride height gauge. There are many on the market with all sorts of designs that measure in millimeters, centimeters or inches. Luckily the manufacturers can help in this area and give you a guide for their intended class of vehicle. The most important thing to remember is to pay attention to where you are taking your measurements. Watch out for irregularities like screws, dirt, plastic flashing or protruding parts that could give you an inaccurate reading.
Before you do anything, double-check that your vehicle is sitting properly into its suspension travel. For on-road cars, a couple of taps down on the vehicle will help it settle, but off-road cars may need a bit more force. In this case, raise the car off the surface about eight inches and drop it on to all four wheels. That should do the trick. Now just measure on the flattest part of the front and rear of the chassis. This is when you’ll want to use a nice, flat surface like a setup board with everything clean. If you are using someone else’s setup measurements, make sure you are taking your measurements from the same spot so you can replicate them as close as possible.
Note: It is a good idea to check your ride height before each run on the track. Also, keep in mind that there are outside influences, like fuel that is being used and rubber lost on the tires, which could contribute to losing ride height, so you may want to compensate for this and decide where you want your vehicle’s settings to be as the race progresses. This can be critical in long racing mains or endurance events.
 5. Tuning Guide
Now that you know how to make changes and measure them, you may need some guidance on the effects to your car’s handling. Here’s a handy little cheat sheet to get you going.
A. Decreasing the ride height (lowering the car): This causes the chassis to roll and transfer weight less. This technique is commonly used on high-bite and smoother tracks where clearance and traction are less of an issue. When traction isn’t an issue, running a lower car often feels more direct and can potentially corner faster.
B. Increasing the ride height (raising the car): This causes the chassis to roll more and transfer weight and it helps with rough or bumpy tracks by reducing the chances of hitting the bottom of the chassis. Do this when traction is low-bite. However, it can feel tippy, or even flip over in high-grip conditions. It also can make the car feel sluggish and react slower with increased chassis roll.
C. Raise the front or lower the rear ride height: Lowering one end of the car or putting the other end higher up gives a little more grip at the lowest end when cornering, but try to stay away from big differences between the two in order to avoid unusual side effects.
6. Don’t Get Disqualified.
Okay, you’ve got a new way to tune your vehicle but before you put the waffle-stomp down on your competition, you’d better check the rule book. Find out what the rules are, if any, regarding ride height. Touring cars and pan cars have strict rules in this area and if you break them, you could find yourself with a DNS (did not start), or worse yet, DQ (that’s right, disqualification). Why the rules? Well imagine a car running around on a carpet track and scrapping everywhere. It’s not hard to imagine that this is going to raise some eyebrows, and even if there aren’t rules (like when you are just practicing), just use a little bit of common sense.
Wrap Up
There are a lot of ways to tune your vehicle, but changing the ride height or making sure it’s in the proper setting is one thing that is often overlooked. It’s easy to do, and usually only takes a few seconds. What’s even better is that it can give you an unforeseen edge over your competitors. Just remember, like anything there are compromises and it can affect your droop, suspension or create some unfavorable handling, especially when pushed to unusual settings. So make sure you’re legal, test your settings and record your findings.
 RC Driver The Best In RC Car & Truck News, Reviews & Video


I noticed a transmission hum after lowering my vehicle by 2″. Mine is a chassis based UV with independent coils in front & underslung semi elliptical leafs with a rigid drive axle assembly.How do I overcome this? By heightening the gearbox cross member a bit so that the prop shaft is sloping down towards the differencial?