Building A Scale Rock Crawler
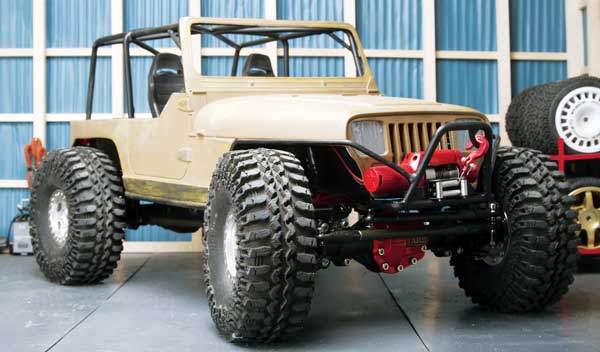
In the rock crawling industry there are two types of people, Toyota people and Jeep people. It seems to be a never ending battle and in some cases, the battle lines have been drawn in the sand. I on the other hand, try to cross over this line and these brands to build a little bit of everything. Crawling has always been something I have a passion for; building in 1/10-scale what my pockets have never been deep enough for in the full-size world. As with anything, this build started with an idea and some research. RC4WD has set the precedent for scale looks and for carrying a wide variety of parts. While most companies offer complete cars, RC4WD has the builder in mind and offers parts in complete packages often months before a full kit vehicle is ever released.
DESIGN
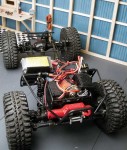
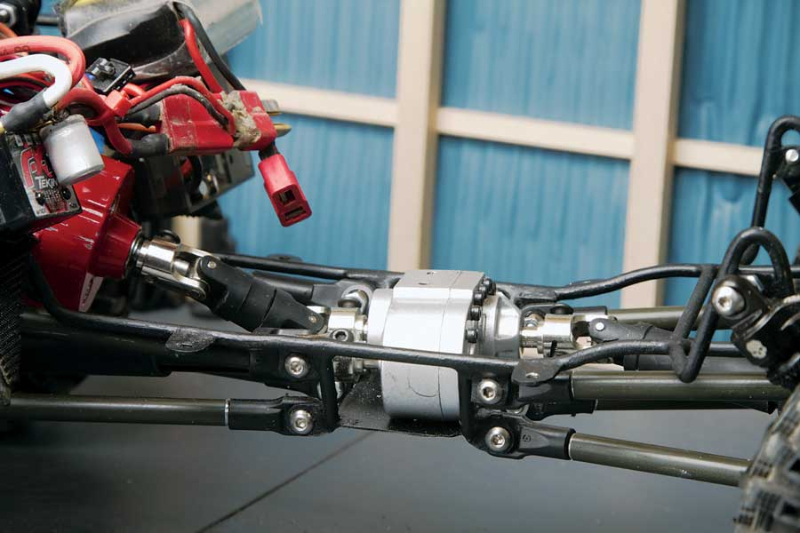
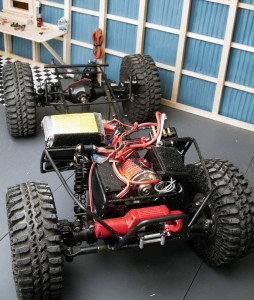
With a stack of parts from RC4WD and a Tamiya Jeep Wrangler body that I had been sitting on for over a year, it was time to start laying out a design that looked scale and worked on the rocks. Scale is the yltimate goal with a build like this. Dropping the floor all the way down was the first concern when building the interior for the YJ. The tricky part with Jeep bodies is how far the floor has to drop in order to get proper scale proportions in the interior. Because of a lack of room under the body, I used small diameter tubing with the body to act as a unified structure—the body itself supporting the chassis and vice versa. I had to make use of every centimeter under the hood. With the RC4WD planetary transmission, I knew the steering servo and electronics would need the rest of the room. The planetary transmission was mounted in line with the RC4WD Killer transfer case; these had to be far enough apart that a driveshaft could be used to couple the two parts together.
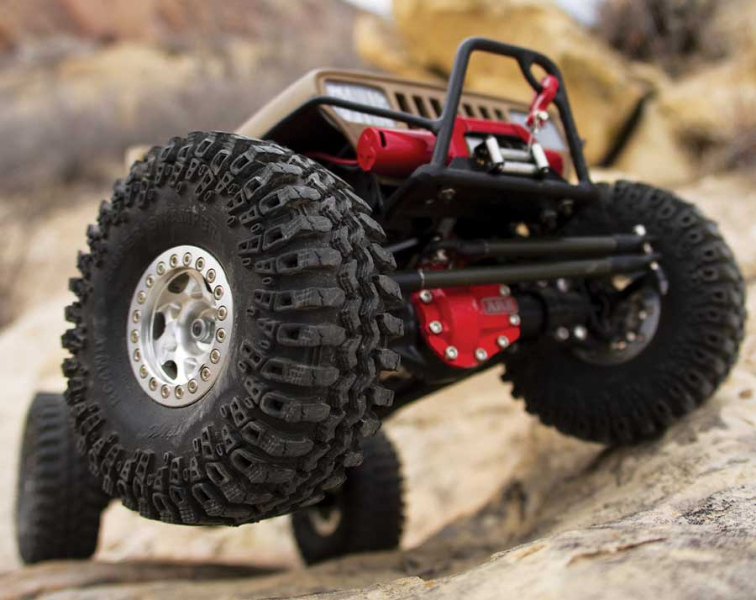
Once the layout was configured, the drop skid section could be made to cradle the transfer case tightly to the body before link tabs could be fabricated. Because of the low-slung look of the Jeep, everything in the chassis had to be very precise and tucked up high into it. The Savox SC-1268SG servo is mounted right above the axle with the servo horn pushed forward to keep the steering linkage parallel to the axle. While a panhard bar would have been optimum on the front of the Jeep, in the end it was easier to run a traditional 4-link and deal with the bump steer while flexing on the trail.
AXLES
The RC4WD ARB T-Rex 60 axles don’t have any mounting locations on the housings; instead RC4WD includes clamp-on mounts. This adds to the number of link mounting locations that can be easily adjusted for different chassis configurations, but makes it tough to find other, more distinct, link geometries. For this chassis, I configured the link mounts differently than RC4WD suggests by clearing the chassis and configuring the links in a manner that fits this chassis better.
SUSPENSION
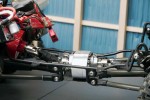
I used RC4WD 90mm dual spring shocks on the Jeep. Ballistic Fabrication caps give them an aggressive look. Because of the custom wheelbase of the YJ, I had to make links to fit. The links are made with Traxxas Revo and Jato rod ends using 8-32 all thread cut to make custom length links. Once the links were mocked up to the correct lengths, I used 6mm brake line to strengthen the links and add a finished look. Once the drivetrain for the YJ was complete, I could work on the rest of the tube work and the body.
TUBE FENDERS AND WINCH MOUNT
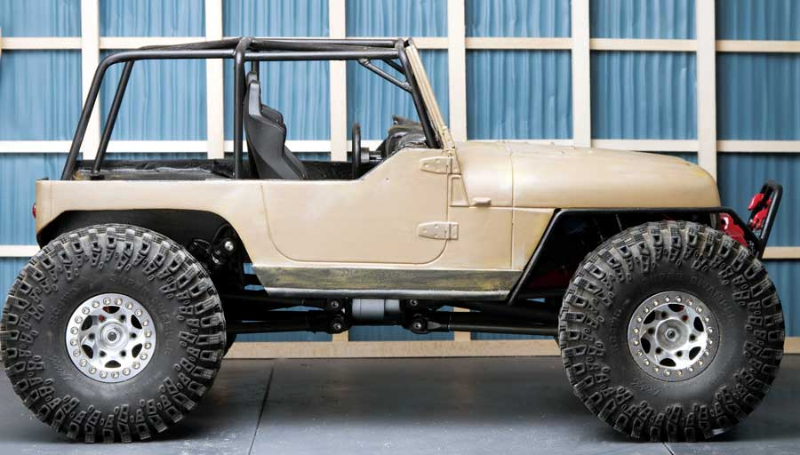
I added tube fenders to the front to protect the body and help hold it snuggly on the chassis. The fenders are brazed to the frame rails and front bumper. The fenders’ 1/8-inch tubing was easy to bend by hand to match the shape of the hood and wrap around it tightly. On the front end, I needed a solid bumper to hold the RC4WD Bulldog wireless winch in place. For the main hoop (stinger), I used a 3/16-inch solid rod to protect the front end. This was brazed to a plate surrounded by 1/8-inch tubing. While I admit that 1/8-inch solid rod can be flimsy for a scale rock crawler, the strength depends on how it is used and how it is braced. After the chassis and front bumper where all brazed together, I could do a final mock-up and check for additional changes before everything was painted.
BODY
Once the drivetrain and chassis were in place, it was time to start on the Tamiya Jeep body. I used an old plastic cutting technique with heavy-duty sewing thread to cut the body up. After that it was time to build an interior out of some styrene and glue it all together. The logistics of working with styrene can be explained time and again, but it is one of those things you need to start playing with to get a feel for it. After the styrene was in place, I began building the cage for the body. It needed an aggressive, but “daily driver” look. For this I used 3/16-inch solid steel rod. While the solid rod is heavier then tubing, it is easier to work with and can be bent tighter to give a realistic bend radius. Once I had an idea for the cage, I bent a B pillar hoop which acted as the basis for the entire cage. From there the cage could be brought forward to the windshield and holes were drilled into the dash to allow the roll cage to pass through. After the main bars were in place, it was a simple question of adding what I wanted to fit the look I was after and brazing to my heart’s content.
PAINT
Painting was a simple job. I sprayed the chassis with automotive rollbar paint and I sprayed the body with rattle can Tamiya tan. The interior got a touch of textured paint before being sprayed black. Let me backtrack a little, though. There are not a lot of dashboard options for the Jeep YJ body. While I could have made a custom dash, I opted to use a New Bright JK dash panel I happened to have sitting around. With a little trimming on the back of the dash and sides, it fit nicely into the body and easily added some detail.
FINISHING TOUCHES
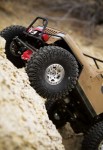
I could not permanently mount the seats in the interior because the body mounted to the chassis all through the interior, so I used tube styrene to space the seats up in the interior and ran screws through the floor into the bottom of the seats. This technique allows for the body to be pulled off the chassis easily. Initially, I had to pull the seats out and take the body off to change the battery. I found this tiresome after changing the battery a few times and opted to cut the hood off so that the body could stay on and battery changes could be done with ease. The Jeep YJ build looked to be coming to an end. While it was still lacking those fine details, I couldn’t help but take it out on the rocks and see what it could do.
FINAL THOUGHTS
Although this project ended up taking a long time to complete, it has been a learning experience. The tight chassis configuration made me pick and choose my battles, learning where to deal with an issue and when it was possible to find another solution that fit the tight workspace. While scale looks are an important aspect of builds like this, there is always some give and take. Performance has to suffer sometimes to get those scale details in a rig. While this is somewhat true, this Jeep YJ is no slouch. When it wasn’t going up competition lines, it was performing like an old Jeep with big tires should—grabbing the rock and pulling itself up and over obstacles. RC4WD’s lineup of scale parts makes it possible to build anything in the scale world. For this build I made a specific selection of parts based on my personal taste, but the best thing about scale is that any number of parts can be used to build the same thing many times over. RC4WD has the scale market cornered with more options for the perfect look than nearly anyone else in the world.
PARTS LIST
ELECTRONICS
• Castle Creations BEC 10A switching regulator—CSE095-0022-00
• Futaba R2004GF 4-channel receiver—FUTL7617
• RC4WD 540 Crawler brushed motor 35T—Z-E0005
• RC4WD Bulldog 9300XT wireless winch—Z-E0014
• Savox SC-1268SG steering servo—SAVSC1268SG
• Tekin FXR ESC—TEKTT1091
• Thunder Tech Racing 850mAh 3S LiPo battery pack
DRIVETRAIN
• RC4WD ARB T-Rex 60 plastic axles—Z-A0052
• RC4WD Distruptor ultra compact planetary transmission— RC4Z-U0002
• RC4WD Killer transfer case— RC4Z0-U0018
• RC4WD TF2 driveshafts
BODY, WHEELS AND TIRES
• Axial Corbeau LG1 seats— AX80090
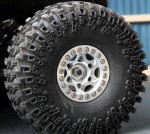
• RC4WD Interco IROK 1.55 scale tires—Z-T0056
• RC4WD Void scale 1.55 bead lock wheels—Z-W0045
• Tamiya Jeep Wrangler YJ body—9335171
SHOCKS
• RC4WD Dual Spring 90mm Scale shocks—Z-D0023
• RC4WD Ballistic Fabrications faux piggyback shock caps— Z-S0286
SUSPENSION LINKS
• 6mm brake line
• 8-32 all thread
• Traxxas Jato rod ends—TRA5525
• Traxxas Revo rod ends— TRA5347
CHASSIS
• RCP Crawlers fabrication tabs
• 1/8-inch solid rod
• 3/16-inch solid rod
• 16 gauge plate steel
Links
Axial, axialracing.com, 949-642-9425
Castle Creations, castlecreations.com, 217-398-8970
Futaba, futaba-rc.com, 800-338-4639
RC4WD, rc4wd.com
RCP Crawlers, rcpcrawlers.com, 909-233-8223
Savox, savoxusa.com, 855-767-2869
Tamiya America, tamiyausa.com, 800-826-4922
Tekin, teamtekin.com, 208-634-5559
Thunder Tech Racing, thundertech.com
Traxxas, traxxas.com, 888-872-9927
 RC Driver The Best In RC Car & Truck News, Reviews & Video


